Fmo Beauty
Liquid blush can make skin look fresh, but one careless swipe may lift the foundation beneath it. The risk is greatest when a creamy formula meets a tacky base, or when a brush drags across the cheek. A bright patch appears. The fix is usually not more foundation; it is gentler placement and less product.
Professional makeup artist Wayne Goss often emphasizes using a light hand and building makeup gradually. A practical summary of that advice is: “Start with a little, then add only where the color needs more strength.” That approach matters because liquid blush varies in pigment, slip, and drying time. One formula may blend easily with fingers, while another behaves better with a damp sponge. Your foundation’s finish matters, too.
This guide to how to apply liquid blush without ruining foundation explores seven careful techniques, from choosing the right tool to setting the finished look. Expect small, specific adjustments: warm a pea-sized dot on the back of your hand, tap color onto the cheek, and pause before adding another layer. Don’t rub. If the base shifts, stop and assess instead of piling on product. I still find that even careful tapping can leave an uneven edge on a very dewy base; it is worth admitting that technique cannot fix every formula pairing. The goal is not a flawless painting. It is fresh color, softened edges, and foundation that stays where you placed it.
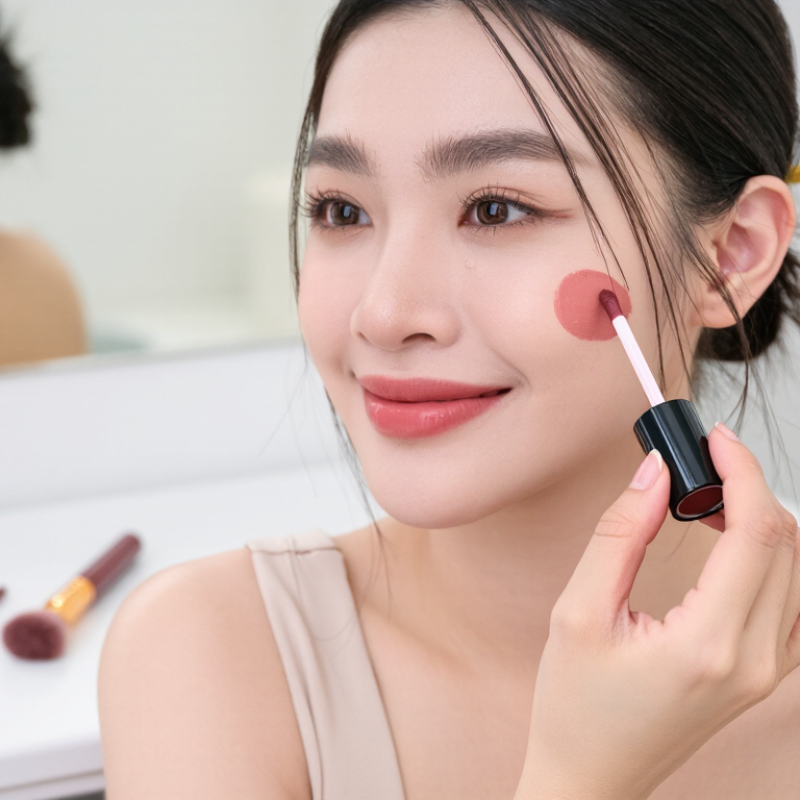
A smooth liquid-blush base starts before foundation. Cleanse gently, then apply a light moisturizer while skin still feels slightly damp. Use less around the nose and chin, where extra slip can make foundation move. Give it time. Wait until the moisturizer no longer feels wet before applying sunscreen, then let sunscreen settle too. If the layers pill when you lightly sweep a finger across your cheek, pause and remove the loose residue rather than adding more product.
Cosmetics Europe’s 2023 market report valued the European cosmetics and personal-care market at €96 billion. That figure describes market size, not proof that any particular prep routine works; the useful takeaway is to judge your own skin, not follow a trend. Apply foundation in a thin layer, pressing it gently over the cheeks with a damp sponge or clean fingers. Avoid rubbing back and forth. Let the base sit for a minute, then tap a small amount of liquid blush onto the cheek. If foundation lifts, the base may still be too slippery, or the pressure may be too firm. I sometimes want to keep adding moisturizer, but more can make the finish less stable. A little restraint helps.
Liquid blush formulas behave differently over foundation, so check texture before choosing a tool. A thin, fluid blush can spread quickly and suit a light foundation layer. A thicker, creamy formula may offer more control, but heavy pressure can still disturb makeup underneath. Feel the texture between your fingers: does it glide, or stay put? Use a small amount first. A pea-sized dab is often more than enough for both cheeks. Formulas do not always pair neatly just because their labels sound similar, so test one cheek before committing to a full face.
Your tool changes how much the blush moves. Clean fingertips warm the product and work well for gentle tapping, though they can lift foundation if you rub. A damp makeup sponge can soften the edges with light bouncing motions. A small, soft brush gives more precise placement, especially near the cheekbones. No tool is perfect. I sometimes reach for a brush, then realize my foundation is already shifting; a sponge may have been kinder. Let the foundation settle briefly, place blush on the back of your hand, and build in thin layers. Pause between layers. If the color looks patchy, stop pressing and check whether the base underneath has moved.
Apply two or three tiny dots of liquid blush to the fullest part of each cheek, not one large stripe. Keep the dots spaced apart. This gives you more control over the color and makes blending easier. Let foundation settle for a minute, especially if it still feels slippery. A damp sponge or clean fingertip can work; use whichever creates less friction on your skin.
Tip: Tap, don’t sweep. Press gently over each dot, then blend outward toward the temples with small, light motions. Check your cheek in natural light before adding more. Liquid blush can look subtle at first, then deepen as it settles. I’ve sometimes added too much while chasing a stronger color. One extra dot is usually easier to manage than a whole cheekful.
If the foundation starts lifting, pause rather than rubbing harder. Try tapping around the edges with a clean sponge, or leave the patch alone and reassess after a few seconds. Use less product near textured areas, where repeated blending can make makeup look uneven. A little asymmetry is normal. Adjust one side with tiny taps instead of adding another layer everywhere.
Start with one small dot on each cheek area, then blend gently with a fingertip or sponge. Add more only if needed. This is a simple application guide, not measured product testing.
Tip 1: Give your foundation a short moment to settle before adding liquid blush. It should feel set, not wet or slippery. Place a small dot of blush on the back of your hand, then pick up a little with a clean fingertip or damp sponge. Less pressure.
Tip 2: Press the color onto the apples of your cheeks with gentle tapping motions. Work outward in small steps, keeping your hand light. Avoid rubbing or sweeping, which can shift foundation and leave a bare patch. If the blush looks too strong, tap around its edges with a clean sponge rather than adding more product.
Tip 3: Build color gradually, checking each cheek in natural light if possible. A thin layer is easier to blend than a large dot. If your sponge starts to drag, pause; it may be too dry, or the base may still be tacky. Add a little moisture to the sponge, then resume tapping. I sometimes rush this part, and the edge can look uneven. Take a moment to soften it before applying powder.
Once liquid blush is blended, give it a minute to settle before setting your makeup. Press a small amount of finely milled translucent powder around the edges, especially beside the nose and under the eyes. Use a soft brush and a light hand; sweeping can disturb the foundation underneath. A damp sponge can soften a powdery edge, but press gently. Don’t rub. Circana reported that U.S. prestige makeup sales grew 9% in 2023. That market figure reflects category demand, not proof that one setting method lasts longer, so treat your own skin and products as the real test.
Tips: If a blush patch looks uneven, tap over it with a clean sponge first. Add a tiny amount of foundation only where coverage has lifted, then blend the edge toward the blush. Avoid adding more liquid blush on top of a heavily powdered spot; it may catch and look darker. I sometimes reach for extra powder too quickly. That can make a small texture issue more obvious.
Finish with a light mist of setting spray, held at the distance stated on its label. Let it dry without touching your cheeks. If the surface still looks patchy, wait until it is fully dry before deciding whether it needs another fix. Circana’s 2023 U.S. beauty sales reporting provides industry context, while careful application remains a practical, individual process.
Start with two or three tiny dots on each cheek. A pea-sized dab may cover both cheeks.
Try a damp sponge for soft edges, clean fingertips for gentle tapping, or a small brush for precise placement. Use the tool that moves your foundation least.
Let foundation settle for about a minute, especially if it feels slippery. Waiting can help reduce patchiness.
Tap each dot gently, then blend outward toward the temples in small motions. Tap, don’t sweep.
Pause and avoid rubbing harder. Tap around the patch with a clean sponge, then reassess after a few seconds.
Try tapping it with a clean sponge first. If foundation coverage has lifted, add a tiny amount of foundation only to that area.
Let the blush settle for a minute, then press a small amount around its edges. Use a soft brush and a light hand.
It may catch and appear darker. I’ve sometimes added too much while chasing stronger color; one small dot is easier to manage.
Learning how to apply liquid blush without ruining foundation starts with a smooth, well-prepared base. Allow skincare and foundation to settle, and make sure the foundation is evenly blended before adding blush. Choose a liquid formula and an application tool that work comfortably with your makeup, such as clean fingertips or a soft sponge. Use only a few small dots on the cheeks; starting with less makes it easier to control the color and avoid disturbing the layers underneath.
Blend gently by tapping or pressing the blush into the skin rather than rubbing or sweeping it across the foundation. Work gradually, adding a little more only if needed. Once the color looks even, lightly set the makeup with a suitable setting product. If you notice a patch or uneven edge, soften it with gentle tapping and a small amount of foundation or powder, keeping the touch light to preserve the finished base.